Pavers & Driveways
Pavers vs. Concrete: Which Driveway Is Right for Your Home?
Interlocking pavers or poured concrete for your LA driveway? Compare cost, cracking, repairs, curb appeal and lifespan before you commit.
Read article →
What actually happens under a paver patio or driveway — excavation, base rock, compaction, bedding sand, edge restraint — and why shortcuts fail in 2 years.
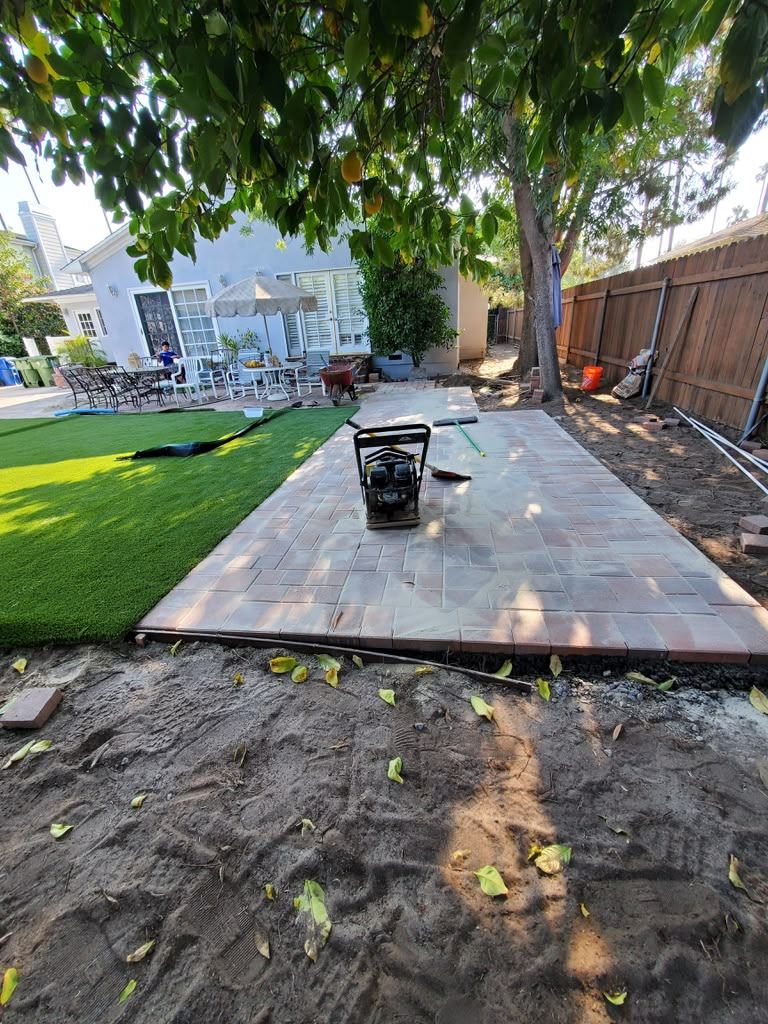
Two paver patios can look identical on the day they’re finished. One will still be flat and tight in fifteen years; the other will wave, rut and grow gaps by its second summer. The difference was decided before a single paver was placed — underground.
Here’s the process we run on every J Hammer paver project, and why each step exists.
We dig out not just the soil, but the problem: organic material, loose fill and expansive clay near the surface. Patios typically need 7–9 inches of total depth; driveways 10–12+, because a car concentrates thousands of pounds onto four small patches. Skimping here is the most common shortcut in low bids — it’s invisible at handoff and fatal by year three.
On clay or soft subgrades we lay geotextile fabric before any rock. It keeps the base gravel from slowly punching down into the soil and disappearing — a main cause of the mysterious dips that show up in older installs.
Crushed miscellaneous base (CMB) goes in — but never all at once. We place it in 2–3 inch lifts, compacting each pass with a plate compactor before adding the next. Compacting six inches of rock in one go leaves the bottom half loose, and loose base settles. This step is slow, dusty and completely non-negotiable.
A precise one-inch layer of concrete sand, screeded flat, gives each paver a uniform seat. More sand is not better — thick bedding layers shift underfoot and telegraph into a wavy surface.
Pavers go down in the chosen pattern — herringbone for driveways (it locks best against wheel forces), running bond or ashlar for patios — with border courses cut in for a finished frame. Blended-color pavers are pulled from multiple pallets simultaneously so color variation spreads naturally instead of striping.
The unsung hero. Concrete or spiked PVC edging locks the field’s perimeter so pavers can’t creep outward and open joints. Every field that’s “spreading” at the edges is missing or under-built here.
Polymeric sand is swept into the joints and the whole field gets a final compaction pass, vibrating the sand down until joints are full. Water activates the polymer, binding joints against washout and weeds while still letting the system flex.
If a bid can’t answer those in writing, the price difference isn’t savings — it’s missing structure. Ask us for our section spec any time; we’re happy to show exactly what your money buys, inch by inch.
Interlocking pavers or poured concrete for your LA driveway? Compare cost, cracking, repairs, curb appeal and lifespan before you commit.
Read article →Demolition, size, slope, material, base depth, drainage — the six factors that set your LA driveway replacement price, and where it pays to spend.
Read article →Refresh, full remodel or layout change? The three kitchen scope tiers, what moves the price in LA, and where the money actually goes.
Read article →Your request is in — we'll reach out shortly. For anything urgent, call (310) 228-8284.